Design and development
Origninal idea
Originally I wanted to use this type of design. Although creative, this design does not meet the requirements for the vinyl assignment as you need a design or logo that works together in unity.
take #2...
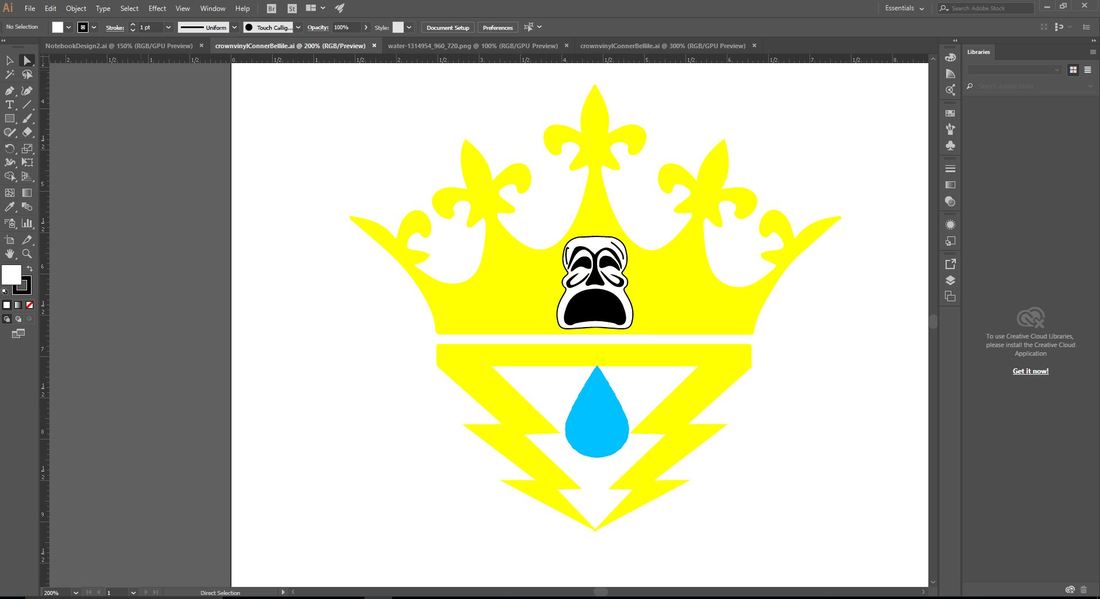
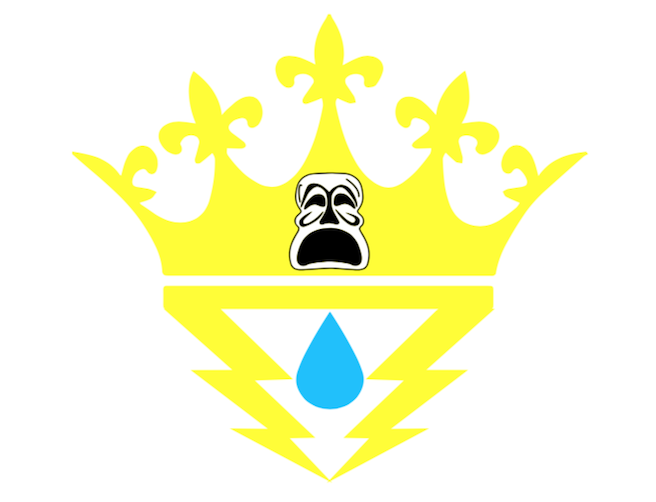
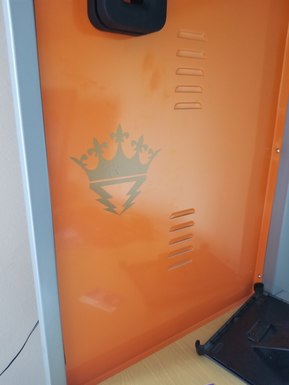
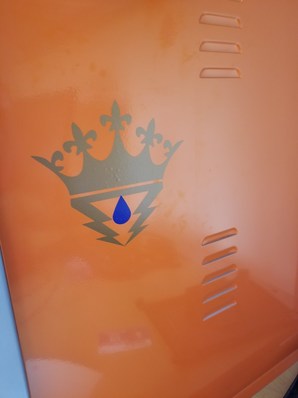
This design worked out a lot better for me because it all comes together. The lighting bolts and the crown compliment each other along with the rain drop and the mask.
The procedure
How to print...
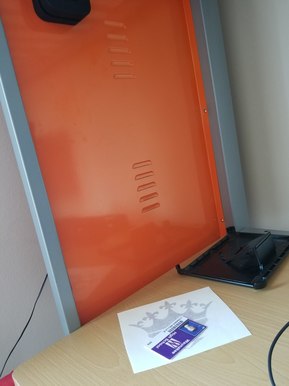
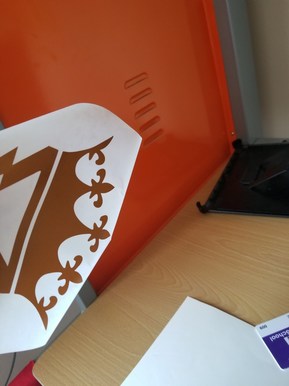
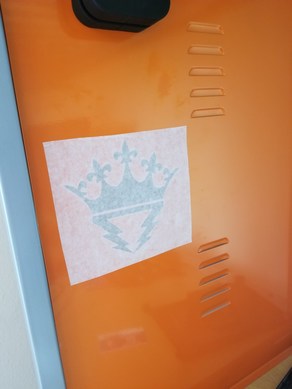
Once you have designed your collaborative logo design, you are ready to print. First, you will load the vinyl cutter with your preference of vinyl. To do so, align the width of the vinyl with the 2 wheels on the vinyl cutter (make sure the rollers are on the designated black roller areas). Once set, pull up the purple lever located on in the top right corner of the vinyl cutter. Push the Roll-1 front set button, then press enter. At this point, the vinyl cutter is set up, and now all you need to do is print. Go the file then cutting master 2. Set up your print making sure there are no black boxes around your images. Print and repeat for other colors. After each print remember to carefully cut each vinyl piece out with the box cutters. Once all the images are printed, use the dentistry tools to peel off the excess vinyl from your images. Now, place transfer tape onto each image and secure the transfer tape using a credit card. The print is now done...
How to place...
|
|
|
|
|
|
To place the images, find a clean surface where you would like to put your design. Once again, use a credit card to further insure that your images will stick to the transfer tape. Now, begin to peel the transfer tape back while making sure the vinyl sticks to the transfer tape. Place the transfer tape and vinyl on the chosen surface, and use a credit card firmly to place the vinyl image. Carefully remove the transfer tape while making sure the vinyl sticks to the surface. Repeat for all vinyl images.
All in all...
I learned a lot from the vinyl assignment. More specifically, I learned about even more intricacies of illustrator. The more and more I use illustrator, the more I learn that you HAVE to image trace your images or else... Overall, this project went a bit more smoothly than the laser project in the sense that the vinyl cutter was pretty straight forward. The simplicity of the vinyl cutter is unbeaten. Things like logos and cool bumper stickers can be designed and printed in minutes. Also, the vinyl cutting machine itself requires little technological setup as only loading and clamping the vinyl is required. The one thing I did struggle with primarily is dealing with the black wheel roller areas on the vinyl cutter. Initially, I was not aligning the wheels so that they were over the areas which caused set up problems. Fortunately, this problem is easily solved by asking a fellow classmate. Overall, this project was pretty good to me, and I felt like I learned a lot during the process.
